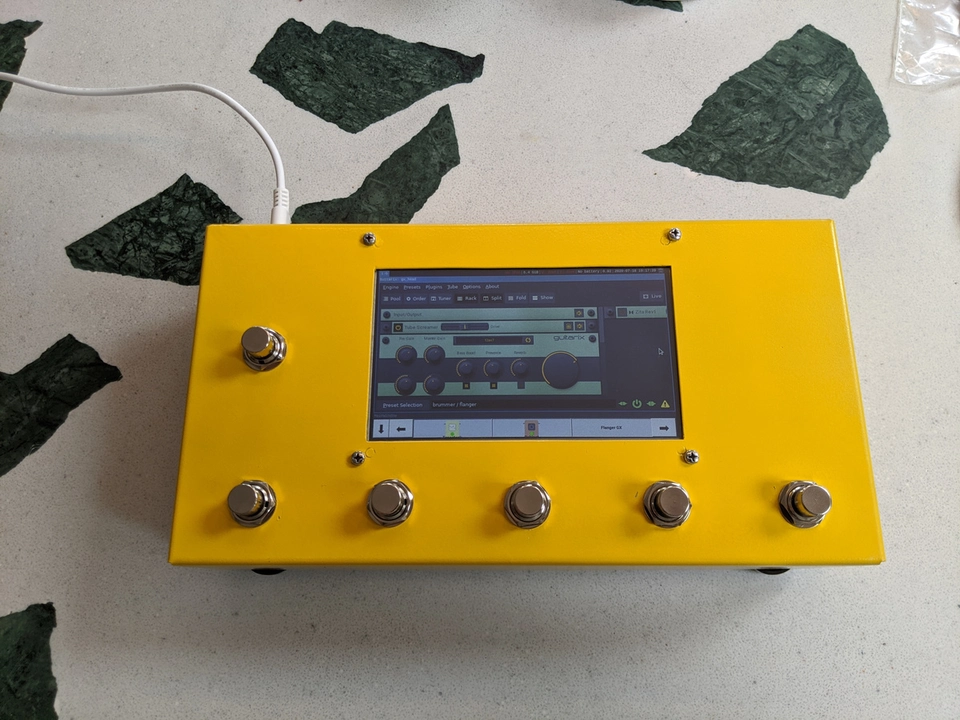
Guitarix Pedal
Motivation
I'd recently been looking to acquire a guitar pedal multi-effect/amp modeller. There's various models available, ranging in cost from about £150 to over £1200. I was really tempted to go for something in the upper-mid-range, but could not overall justify the expense.
Looking at the devices, however, they mostly nowadays consist of various types and numbers of the following components:
- Foot switches; at least 3
- Indicators for foot switches; either built-in RGB LEDs, or adjacent LEDs or even small LCD screens
- A main LCD screen, usually now full colour graphical and sometimes touchscreen
- An expression pedal or two
- Some number of audio inputs and outputs; usually at least 1 guitar input and a stereo output
- Some other knobs for volume or parameter control
- Some other buttons for setup, load/save functions etc
Obviously internally these devices now are running a reasonably powerful CPU/DSP of some sort with a nice fully graphical interface to control it. It occurred to me that a Raspberry Pi 4 would likely be capable of performing such duties...
I also knew from "The Task Switch" project that wiring up several push buttons to a Raspberry Pi is not particularly difficult, and neither is driving some kind of display - either dot-matrix LCD or touchscreen etc.
Hardware
I set about looking for suitable components to start building my own pedal, although going for the full compliment of possible components does indeed start to add up in cost to the point where if you want a pedal with all the bells and whistles, you may as well just buy one off the shelf.
So, I limited the scope of my design to just the following:
| Part | Cost Per Item | Quantity | Line Cost |
|---|---|---|---|
| Raspberry Pi 4, 2GB + PSU + SD Card | £59.00 | 1 | £59.00 |
| 5 inch HDMI display with touch | £42.99 | 1 | £42.99 |
| Foot-switch FS5700SPMT2B2M1QEH | £4.61 | 6 | £27.66 |
| Enclosure BUD AC-403 + bottom plate + feet | £21.77 | 1 | £21.77 |
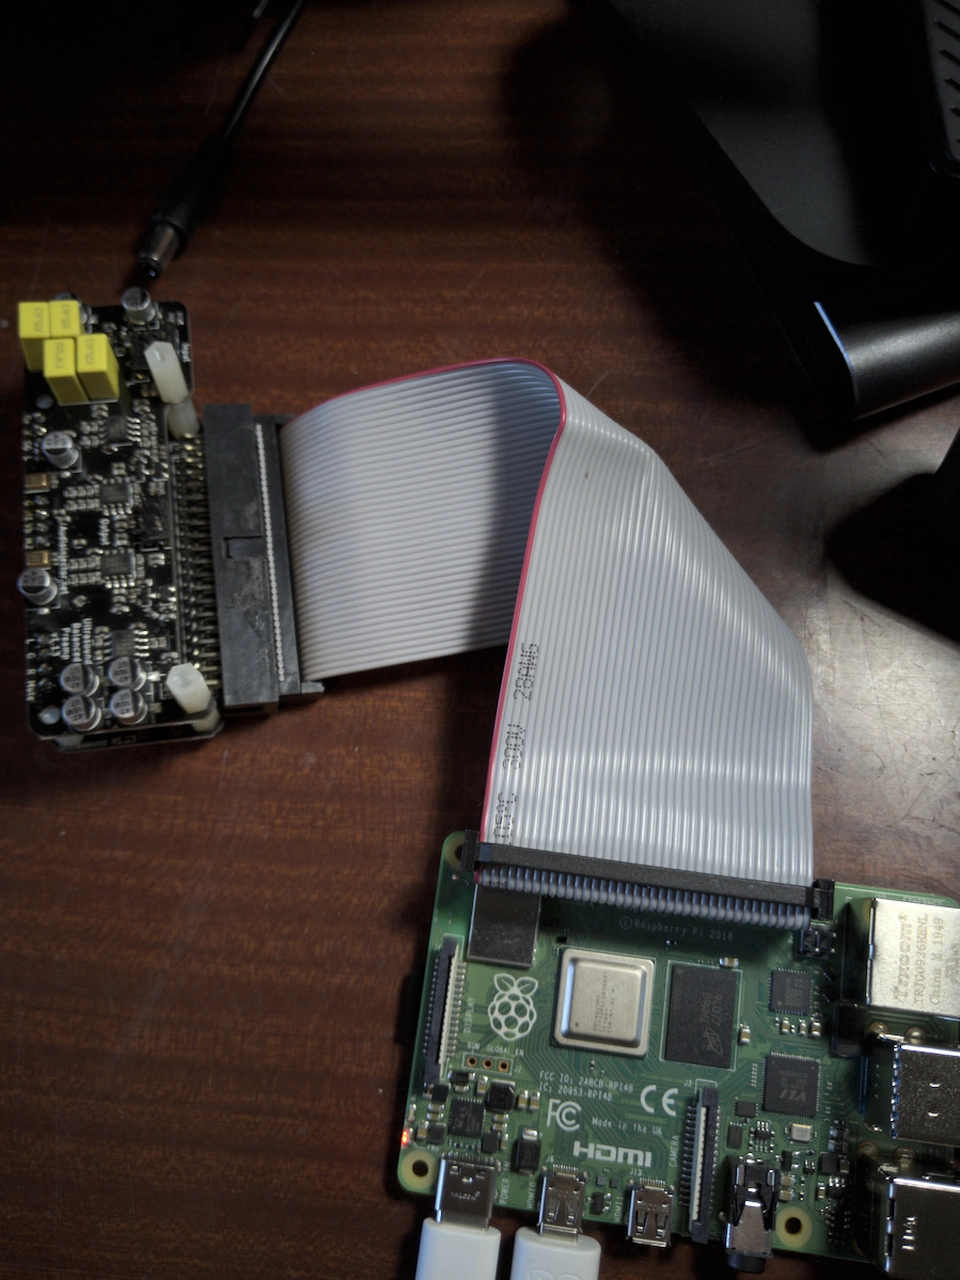
| Audio Injector Ultra 2 | £62.05 | 1 | £62.05 |
| Other various cables, connectors, hardware | £29.05 | 1 | £29.05 |
Total cost of parts: £242.51
The Audio Injector interface turned out to be a large part of the cost, however it runs up to 24bit/192kHz at very low latency - which is important for good sound quality and playing live.
My intention is to use the 6 buttons for the following functions:
- "page change"
- "Previous"
- "Select" 1, 2, and 3
- "Next"
The select buttons may activate a preset bank, a preset or toggle an individual effect on/off depending on the current page. The "page change" button cycles between banks, presets, units. "Previous"/"Next" scroll through the items on the current page and "Select" activates an option on the current page.
I created an OpenSCAD model of the components and the enclosure, in order to figure out where to place everything and check that it will all fit in the enclosure:

This turned out to be a good exercise, but in the end I didn't use all of the CAD dimensions to actually make the enclosure.
Software
I have set up the Raspberry Pi to run the latest Raspbian operating system (i.e. the default choice).
On top of that there are actually many options for the DSP; Guitarix and Rackarack to name but two. I could even set up my own chain of plugins using a plugin host for JACK, for example.
I opted to go with Guitarix, since it seems very well written, the UI is well thought out, looks good and has quite a few publicly published banks of presets. It also exposes a JSONRPC API for remote control.
To bring this all up on the Raspberry Pi, I configured the OS to auto login and run i3wm window manager, so that the application start with a predictable position and layout on the small screen - I will later also run my own remote control app which interfaces with the foot switches.
When i3 starts, it is given a screen layout to use, creating placeholder regions for both Guitarix and the guitarix-foot-remote apps. It also starts up JACK in the background.
guitarix-foot-remote
The only custom software in this build is a small app which reads the foot-switch states, and uses the inputs to control Guitarix via its JSONRPC interface.
I have open sourced the code, it is published here on my bitbucket.
The repo also contains some of the hardware reference drawing, and enclosure design drawings.
The app is designed to display 3 "tabs", corresponding to the "Select" foot-switches. The tabs cab be scrolled with the "Previous"/"Next" buttons and the page cycled between Banks, Presets and Units with the "Page" button
Banks page:  Selecting a bank changes the UI to the Presets page.
Presets page:  Selecting a Preset changes the page to the Units page.
Units page:  Selecting a unit will toggle its on/off state.
Pressing the Page button will return back to the Banks page.
Other acknowledgements:
Assembly
First test of the audio interface, to prove that this configuration is viable:
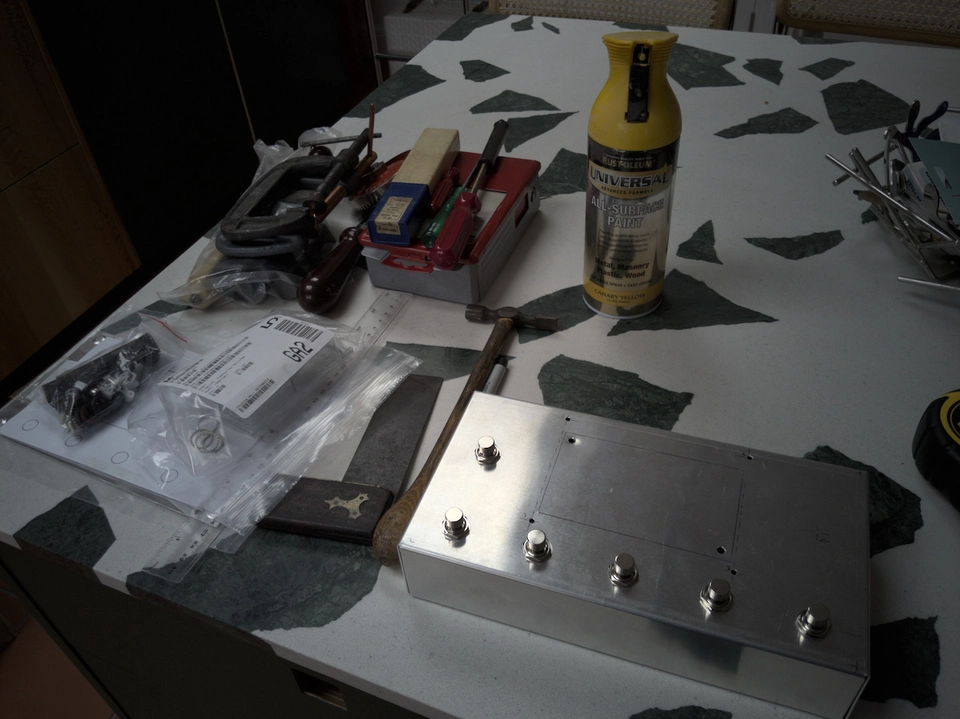
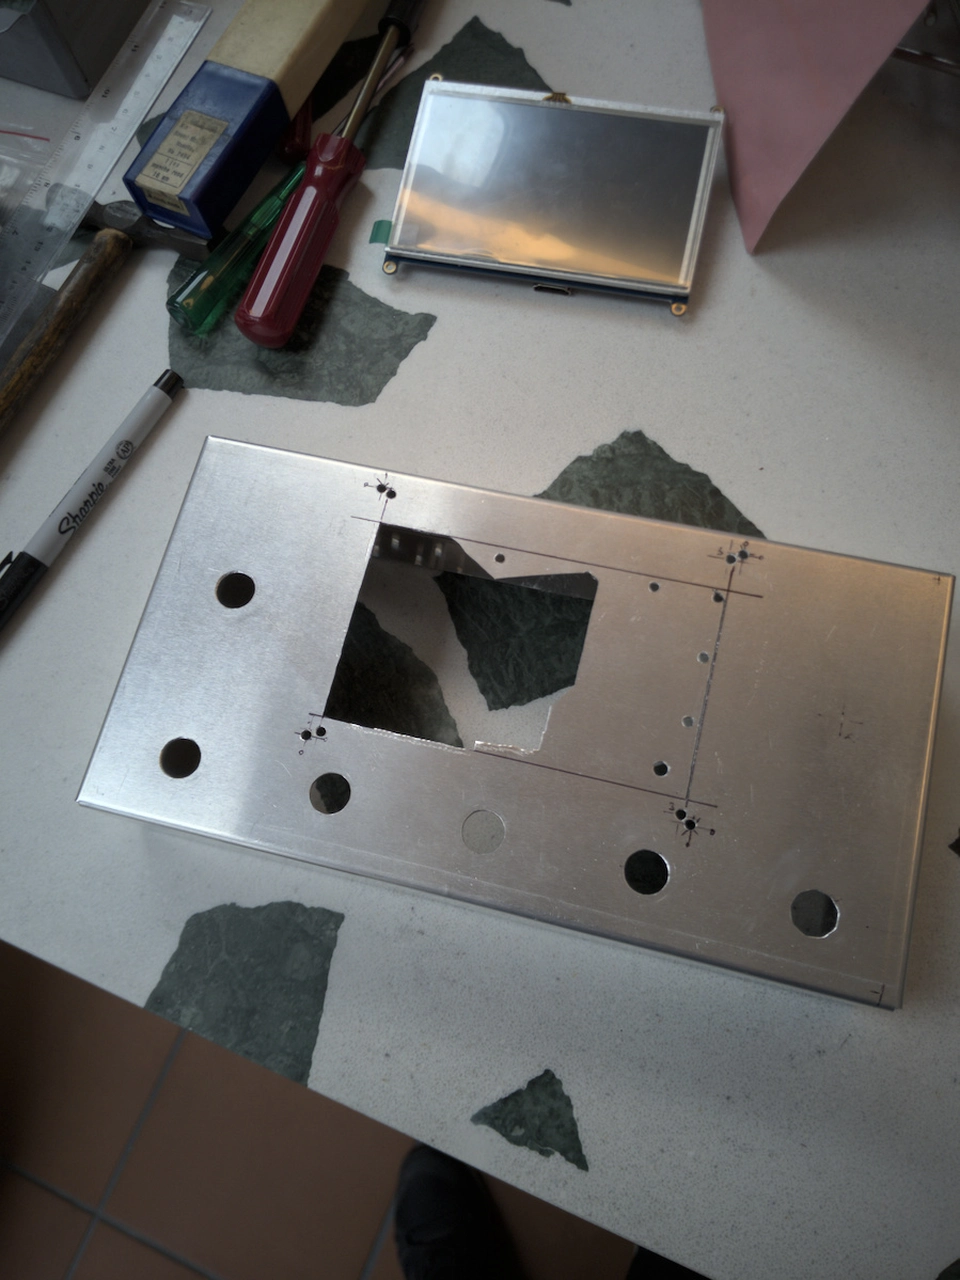
Marking out the enclosure, drilling and cutting holes:
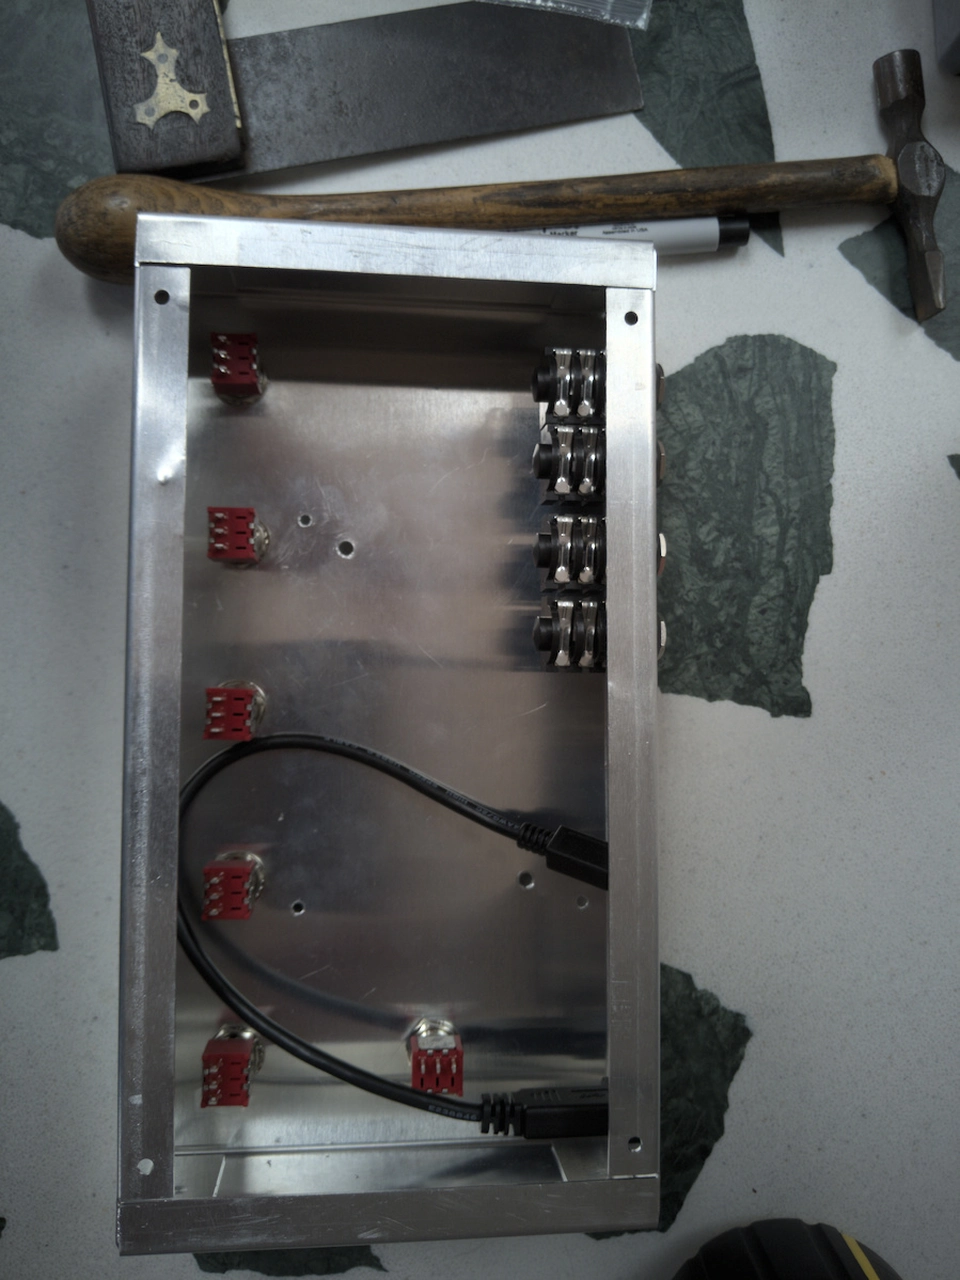
Aligning the Raspberry Pi etc on the bottom plate, against the other internal components:

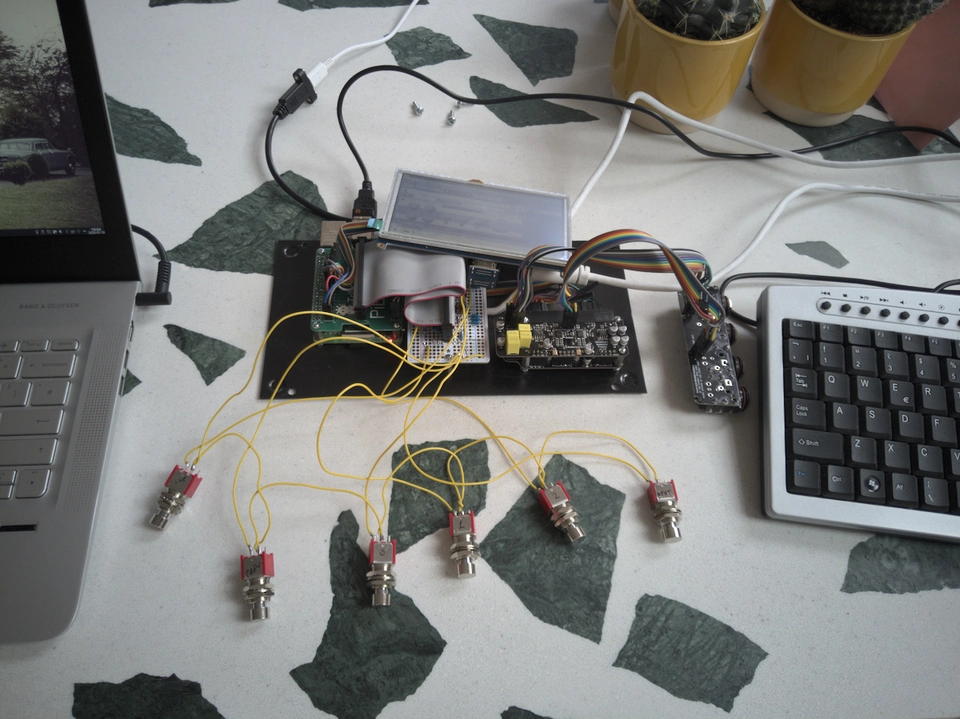
Full system assembly testing (without enclosure):

Painting the enclosure:

Final assembly:

Problems encountered along the way
The CAD printouts for the enclosure holes came out at the wrong size. I really should have measured these before starting to cut. As a result, the initial holes I drilled for the screen mounting screws were in completely the wrong place. I had to subsequently fill these in before painting.
The 40-pin flat cable for the audio interface was not long enough, I replaced it with a few jumper wires instead.
Some of the internal cables and wiring took up too much space, such that I could not completely close up the unit. I had to replace the other 40-pin flat cable for the buttons interface with much smaller/slimmer wire-wrap wires.
In the process of multiple assembly/disassembly whilst making the enclosure I broke the micro USB socket on the display. This was supposed to be used as the main power input to the entire system. I tried to repair it but to no avail. I elected instead to use the GPIO block to connect the screen power. However, the jumper pins to the screen also took up too much space, preventing the unit from closing. I ended up cutting the ends off the jumper wires and soldering them directly to the display circuit board - fortunately solder pads were provided.
I had to perform a similar adaptation with the audio interface, using jumper wires was not good enough of a connection which caused a lot of noise and crackling on the audio output. I ended up again cutting the ends off the jumper wires and soldering them directly to the audio interface PCBs.